I recently finished a new wire sculpture and decided to do a step-by-step photo session of it to show how these come together from a big spool of wire to finished sculpture.
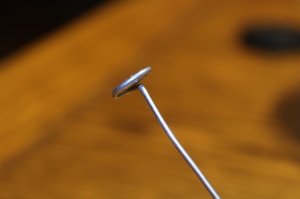
For this project, I used 17 gauge steel fencing wire, as pictured below.
These are my tools for this project, as well as my bare hands.
And this is how this particular sculpture started out – as a sort of creepy, two-legged, skeletal horse.
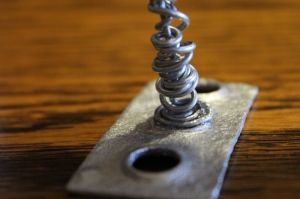
Once this basic start was in place, I began to construct the remaining two legs. To do this, I started by making a tight coil (think of a burner on a stove); this will be the bottom of the hoof. I cut a length of several feet of wire for this so I have plenty to build with.
Here is the coiled hoof.
Side view of the hoof.
I then shape the wire extending from the hoof to resemble the shape of the horse’s leg. In this case, the two legs yet to be connected are going to be bent as the horse is in motion. Below is the back leg.
Here is the front leg. While working on sculptures, I frequently like to hold all the pieces together to make sure the proportions and angles are looking right. The front leg is not yet attached in the picture below, just resting in the right place.
The leg now attached. Notice there is also more bulk in the body of the horse as well.
The horse is all in one piece at last, and does stand independently, but is not very stable.
A photo of the other side.
The front.
At this point, now that the horse has all his legs, it is time to begin bulking up the body so he doesn’t look quite so creepy and bony. 🙂
Notice the addition of ears now, as well.
This is where the sculpture gets really fun. It’s embellishment time! After sorting through my collection of junk, metal bits, and jewelry, I decided to go with chain for the tail. I took a necklace chain and broke it into pieces with my pliers in various lengths like so.
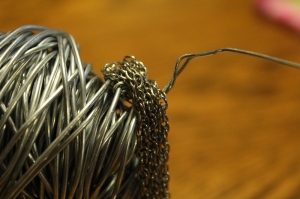
I then fastened them all together on a necklace clasp (from the same necklace – no link or loop of chain is garbage! 😉 ). After that, I simply attached this clasp to a wire on the horse’s hind end. After that, I used fine wire to attach it firmly in place so it wouldn’t slide around. I also used wire to give the tail a bit of lift. This is a spirited horse, after all. Here is a progress shot of the tail.
And the finished tail.
Next, the mane. I love to think outside the box with features like a horse’s mane. This time, I decided on an earring I had in my collection. It has been waiting for the right project for quite a while, and I am happy to have used it at last.
No peeking! I’ll show the finale on the mane soon enough. 🙂
Finally, I decided to use a base for this for additional stability. This is a metal found object in my collection.
Using a metallic paint…
I cheered it up a bit.
And then, using my handy-dandy acrylic gel…
…as glue, (this stuff is amazing!), I attached the front hoof to the base. I may need to wire it for added stability, but it’s not too bad as is.
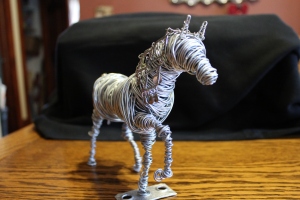
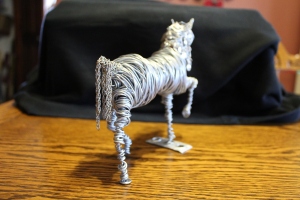
And here we are, at long last, with the grand finale.
Prancing Horse
– 8 1/2 inches long x 7 inches tall x 2 inches wide.
– Made with 17 gauge steel fencing wire, fine craft wire, and found objects.
– I spent 5 – 8 hours on this I’d guess.
A few various angles and close-ups.
Update: (two years later)
Unfortunately, the base for the foot did not hold out in the long run, so I had to come up with a new approach to attaching a different base that would hold permanently. The product used was JB Weld, and though it changed the look of the sculpture a little bit, at least it is extremely sturdy and sound. The updated photos are below. I’ve also learned a thing or two about photographing sculptures, too. 🙂
Thank you for looking, for bearing with me through this picture-heavy post, and for any comments you may wish to leave. Have a great week!











janukke
June 5, 2013 at 7:35 AM
This horse is amazing! It´s very perfect. To me it is like a miracle that you can make something this horse-like from simple fencing wire. Love that mane, too!
And thank you so much for these step-by-step pictures! It is almost like watching you work on the sculpture. So much fun!
Jenna
June 5, 2013 at 8:33 AM
Jana, thank you very much for the wonderful comments! It means so much to hear you like this. I really enjoy making these sculptures, and I’m happy you enjoyed watching the progression from start to finish. Thanks again! 🙂
Inspired and pretty
June 9, 2013 at 12:14 PM
This is A-MA-ZING and superb !! This is my favourite among all the sculptures I saw on your blog. I’m really impressed with the mane and tail, the necklace and earring are perfect for that. You have such a great eye to see how you can use all sorts of junk materials, jewelry, etc.. I would have thrown the metal you used to stabilize the horse in the garbage but you saw a utility for it !
I really loved the step-by-step photo session, it’s great to see all the steps involved in creating these sculptures and also the tools you used. You should make an exposition of your sculptures, I’m sure you would have a great success ! A superb sculpture Jenna 🙂
Jenna
June 9, 2013 at 12:56 PM
Jocelyne, what wonderful comments! Thank you so much! This is one of my more elaborate sculptures to date, so I’m happy those little extra details are appreciated.
Thanks! The photo session of this was time-consuming, but fun to do nonetheless.
It’s so interesting you say that, because I’ve just gotten into a juried art show that will take place in August. At this show, I will be offering prints, drawings, photos, copies of my book, and sculptures for sale. Thanks again. It is very much appreciated!
Inspired and pretty
June 9, 2013 at 9:40 PM
How exciting ! I hope you’ll make lots of sales !
Jenna
June 10, 2013 at 12:23 PM
Thank you so much, Jocelyne! I am very excited about this show, and have a lot of planning to do before the day of the show. Happy planning, full of anticipation. 🙂